Close

đŸ©ș Logging Medical Exams in Strive DB

Medical exams are a key part of helping survivors, and Strive DB makes it easy to attach them directly to a case. Whether you’re tracking SANE exams, follow-up visits, or hospitalization info, you can enter everything in one place, where it stays tied to the larger case record.

This post walks through how to log a medical exam step-by-step, based on the training video.


🧭 Step 1: Navigate to the Case

You’ll start by locating the case you want to update:

  • Click Advocacy in the left-hand menu
  • Open the Cases table
  • Search for and select the relevant case

🔗 New to navigating the platform? Start with our system overview or intake guide to get familiar with case structure.


đŸ§Ș Step 2: Open the Medical Exams Tab

Once you’re inside the case, click the Medical Exam tab at the top. This section shows all exams currently associated with the case.


➕ Step 3: Add a Medical Exam

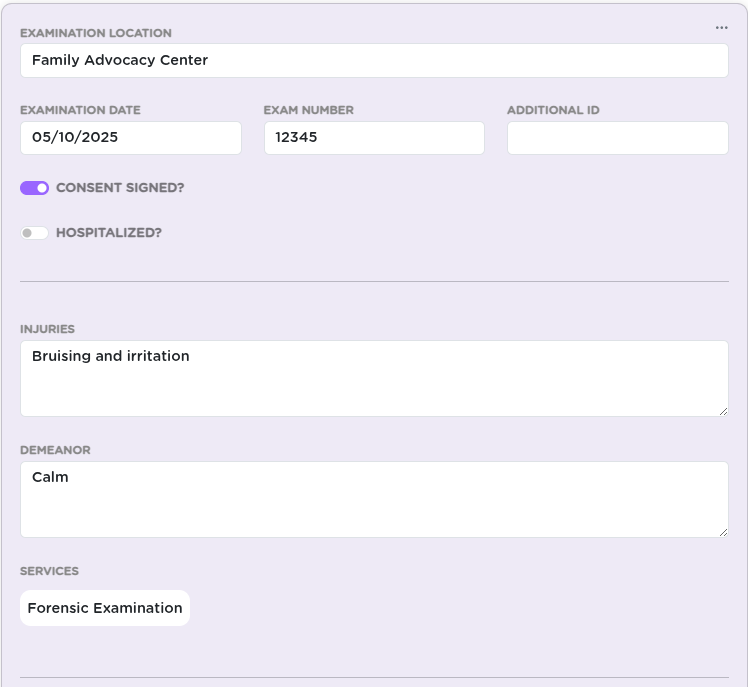
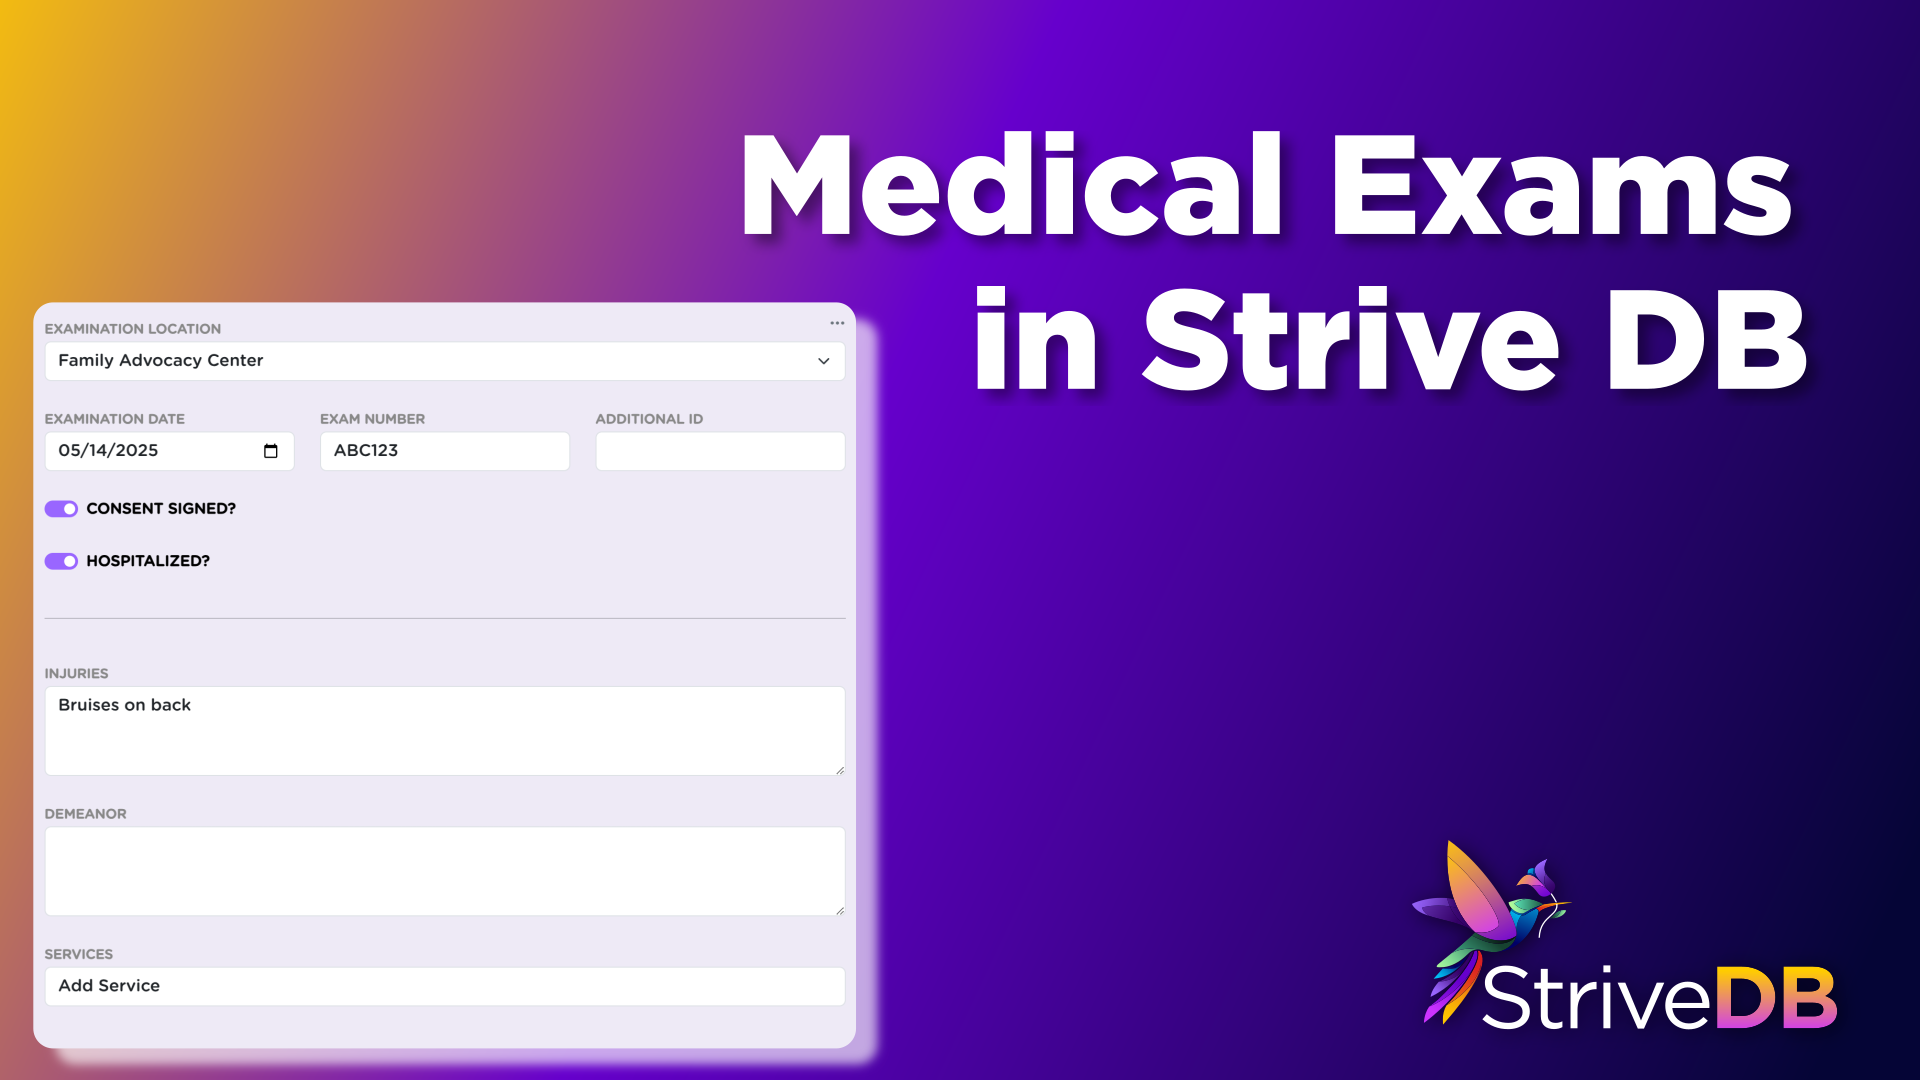
Click “Add a medical examination”. This brings up a form to log the key details.

Here’s what you can enter:

  • Exam location (e.g., hospital, clinic)
  • Date of the exam
  • Exam number (if your agency uses tracking IDs)
  • Additional ID (optional)
  • Consent – was consent signed for the exam?
  • Hospitalization – was the survivor hospitalized?
  • Notes – injuries observed, demeanor, other context
  • Related services provided as part of the visit
  • Nurses involved in the care

đŸ’Ÿ Step 4: Save the Exam

Once the form is complete, click Save to finalize the entry. The new exam will now appear in the list on the Medical Exam tab, attached to the case.


đŸ§‘â€âš•ïž Step 5: Add SANE Nurse(s)

As part of logging the medical exam, you can also associate one or more nurses who were present for or performed the exam—especially helpful for SANE documentation.

  • Select nurse(s) from the dropdown list. This pulls from staff records already in your system.
  • If you don’t see the right person, reach out to an admin to have them added as a user with the appropriate role.

This information helps maintain an accurate record of who provided care, and ensures that the nurse’s involvement is connected to the case and service records for auditing and follow-up.

đŸ©ș You can associate multiple nurses if more than one provider participated in the exam.


🛠 Step 6: Manage Existing Exams

You can always return to this section to:

  • Edit existing exams
  • Delete a mistakenly added record
  • Add another exam (if the client had multiple visits)

Just use the dropdown menu next to each record to make changes.

🧠 Keeping this section current helps ensure medical details are available for documentation, follow-up services, and case-level documents.


🧠 Final Thoughts

Strive DB helps you log medical care securely and thoroughly, Whether you’re entering your first SANE exam or updating a long-term support case, the medical exam tab is where that record belongs.

💬 Need help mapping your agency’s medical workflow into Strive DB? Reach out to support—we’ll help you get it right.
📁 Uploading and Managing Client & Case Documents in Strive DB

Strive DB makes it simple to keep all documentation organized, secure, and exactly where it belongs—whether you’re uploading a document tied to a specific case or attaching something directly to the client.

In this guide, we’ll walk through how to upload documents to both cases and clients, and how to view all files in one place from the client record.


🧭 Case vs. Client: Where Should Documents Go?

You can upload documents in two places:

  • From a Case – For documents tied to a specific incident, like a medical record or restraining order.
  • From a Client’s Profile – For general documents not associated with a particular case, like intake forms, signed releases, or ID copies.

[Insert screenshot: Client profile > Documents tab showing grouped files]

🧠 Think of the client’s Documents tab as a full document history across all cases and interactions.


📂 Uploading a Document to a Case

Step 1: Find the Case

Go to the Advocacy → Cases section. Search for and open the case you want to work with.

Step 2: Open the Documents Tab

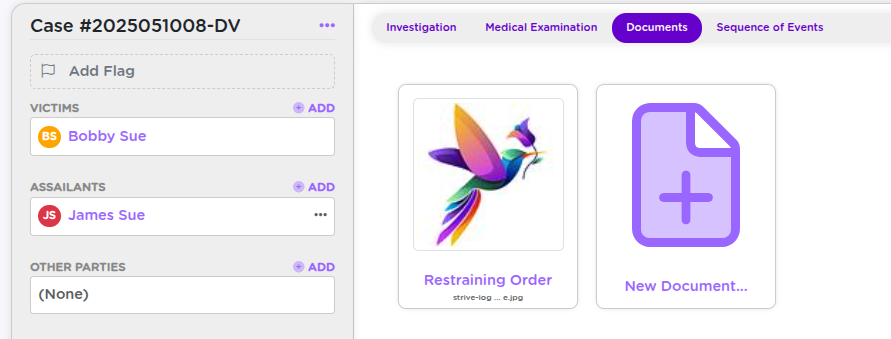
Inside the case view, click on the Documents tab. This shows any files already uploaded to this case.

Step 3: Upload

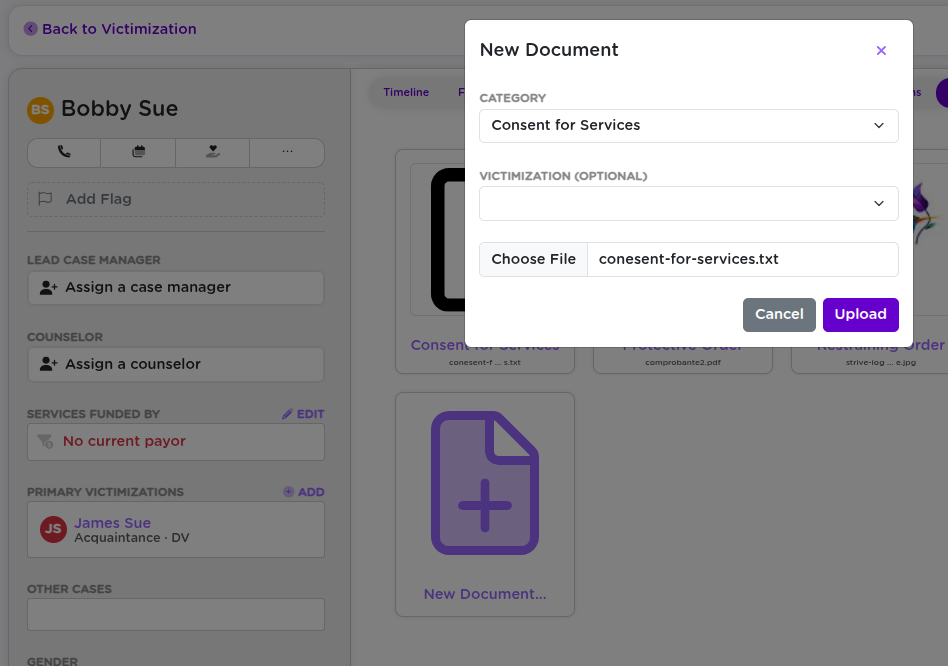
Click “Upload a new document”, then:

  • Choose a Document Kind (e.g., Exam, Court Order, Counseling Form)
  • Select your file
  • Click Upload

✅ Once uploaded, the document will appear in the list for that case and also show up in the client’s master document view.


đŸ‘€ Uploading a Document to a Client

You can also upload documents directly to the client.

  1. Go to the People section and open the client’s profile.
  2. Click on their Documents tab.
  3. Click “Upload a new document”.
  4. Select a Document Kind and upload the file.

💡 Documents uploaded here may or may not tied to a specific case, but will still show up alongside case files in the same tab.


đŸ“„ Downloading & Viewing Documents

Click on any listed file to download it instantly. This works from:

  • The case-level Documents tab
  • The client’s master Documents tab

🧠 Best Practices

  • 🗂 Be consistent when choosing document types—this makes reporting and filtering easier.
  • 🔐 Respect privacy settings—only upload what’s appropriate, especially when not case-specific.
  • 🔍 Use the client’s Documents tab as your go-to for a complete paper trail.

🧠 Final Thoughts

Whether you’re attaching files to a case or uploading documents directly to a client, Strive DB keeps everything organized and accessible when you need it most. The full picture is always just a few clicks away.

💬 Have questions about file types, categories, or permissions? Reach out to support—we’re here to help.

📅 Managing Appointments in Strive DB

Appointments in Strive DB aren’t just calendar events—they’re the backbone of scheduling, documenting services, and staying compliant with your organization’s workflow. Whether it’s a counseling session, advocacy check-in, or group meeting, the appointment system helps you handle it quickly and cleanly.

This post walks through how to create, manage, and follow up on appointments, based on the training video.


🧭 Accessing the Appointment Scheduler

There are two main ways to schedule a new appointment in Strive DB:

  • From the top convenience bar, click “Schedule” — available from anywhere in the system
  • From a client’s profile, click “Schedule Appointment” to auto-fill that client into the form

💡 Starting from a client’s profile saves time and avoids duplicate searching.


📝 Setting Appointment Details

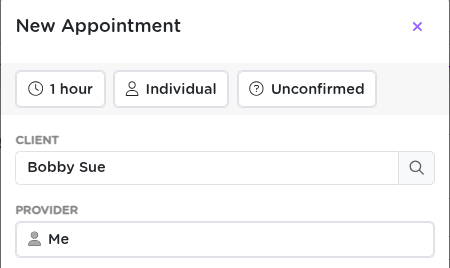
At the top of the appointment form, you’ll configure the key details:

  • Duration – Choose how long the session will be
  • Type – Individual or group appointment
  • Status – Tentative, confirmed, cancelled, etc.
  • Provider – Defaults to you, but can be reassigned to another staff member

✅ Keeping appointment statuses updated helps other team members know what’s coming up.


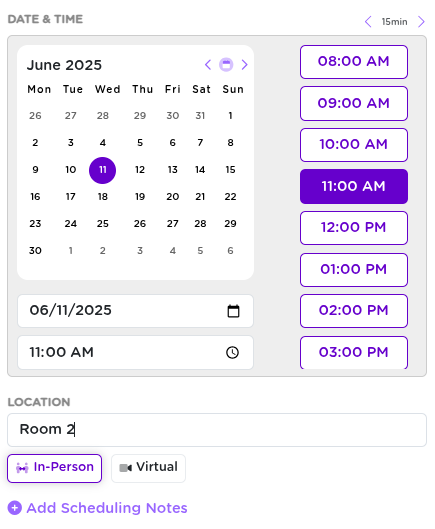
📆 Selecting a Date and Time

Use the built-in calendar widget to find available times. It shows:

  • Which days have openings (based on your availability settings)
  • Time slots on a selected day
  • Real-time updates so you don’t accidentally double-book

Once you find the right slot, click it and continue.


📍 Adding Location & Notes

Next, include optional but helpful context:

  • Location – e.g., “Zoom”, “Room 2”, or “Off-site”
  • Note – Any notes you want visible to team members viewing the appointment

đŸ’Ÿ Saving the Appointment

Once everything’s filled out, click Save.

You’ll be taken directly to the appointment’s detail page, where you can:

  • Review or edit the info
  • Add session notes
  • Start follow-up tasks right away

🔁 Managing Appointments After Creation

Once the appointment has occurred—or not—you’ll want to log the outcome. From the appointment’s page, you can:

  • Mark attendance status (e.g., Attended, Late, No-show)
  • Add a Follow-Up Reminder
  • Attach a Counseling Session, often using a session-specific form
  • Edit/reschedule the appointment as needed

🧠 This workflow ensures your services are recorded accurately and quickly tie into reports and grant tracking.


🔍 Viewing Appointments

From the Appointments tab, you can:

  • View daily or weekly schedules
  • Filter by staff member, client, or service type
  • Switch between list view and calendar view
  • Jump to a date or scroll ahead for upcoming work

📎 Linking Appointments to Case Work

Appointments automatically connect to:

  • Client profiles – full appointment history and documentation
  • Staff/provider records
  • Service logs – when tied to session forms
  • Reporting – all outcomes and durations feed into organizational data

This means nothing gets lost and everything you log stays tied to the broader support picture.


🧠 Final Thoughts

Appointments in Strive DB aren’t just boxes on a calendar—they’re fully integrated records of service. They help you track what happened, stay on schedule, and document the critical work you’re doing.

💬 Need help setting up availability or figuring out provider scheduling? Reach out to support—we’ve got your back.

đŸ“„ Completing an Intake in Strive DB

The intake process is one of the most critical parts of using Strive DB—and thankfully, it’s designed to be both thorough and intuitive. Whether you’re helping a new survivor or opening a new case for someone already in the system, Strive walks you through every step.

This post breaks down exactly how to complete an intake


🧭 Starting a New Intake

There are two main ways to begin a new intake:

  • From the People tab: click Start Intake next to an individual.
  • From the Cases table in the Advocacy tab: click Start Intake to begin from scratch.

đŸ‘„ New Client or Existing?

The very first step is deciding:
Is this for someone new, or for an existing client with a new case?

If you’re not sure, start typing their name. If they show up—great! You can associate the intake with their record. If not (e.g. no match for “Susan”), go ahead and create a new client profile.

💡 This keeps your data clean and avoids duplicates.


📝 Logging Intake & Incident Details

Next, you’ll enter the intake details and information about the incident. The form is comprehensive, but it’s all laid out clearly.

You’ll be asked to fill out:

  • Who did the intake – The primary advocate, and you can add as many secondary advocates as you want
  • Intake date, time, and location
  • Incident timing – when the incident happened, when the outcry occurred, who it was made to, and whether the date is estimated
  • Assault details – type of assault (e.g., domestic violence), presence of weapons, injuries
  • Assault location – the general location type and ZIP code (auto-fills city/county/state)
  • Client circumstances at the time
    • Martial Status
    • Pregnancy
    • Living Arrangement
    • etc
  • Police report details (if applicable)
    • You can also add police officers
  • Sequence of events as told by the client

✅ These fields ensure everything from funder requirements to legal documentation is captured in one pass.


đŸ‘€ Adding the Survivor / Client

If you didn’t connect this intake to an existing client earlier, now’s the time to create their profile. You’ll be prompted to enter:

  • Full name, along with any other legal names
  • Birth date (automatically calculates age)
  • Gender, race, ethnicity, and tribal affiliations
  • Barriers the client may be facing (e.g., substance use, housing insecurity)
  • Incarceration status at the time of intake
  • Addresses – multiple can be added, and ZIP code lookups will autofill city, county, and state
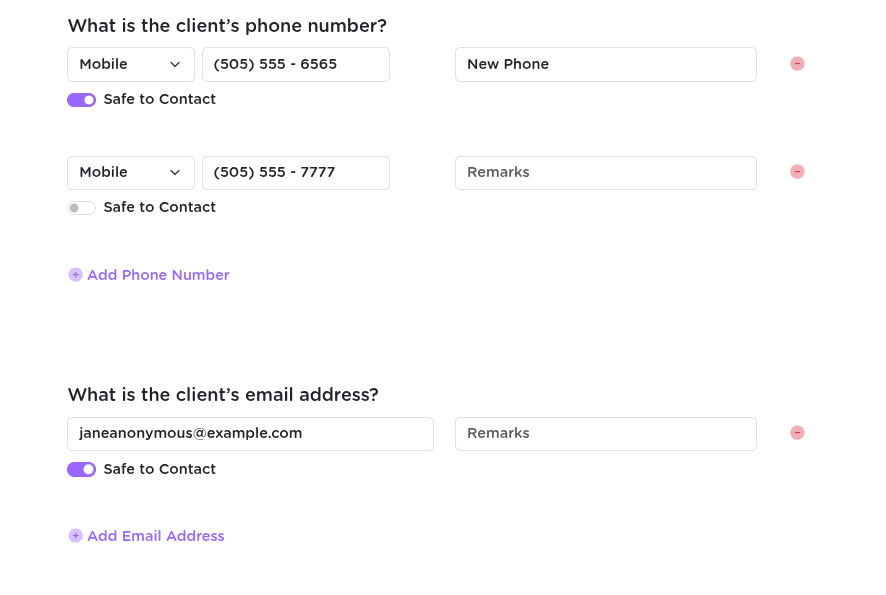
  • Phone numbers – you can add multiple; each one includes a “safe to contact” checkbox 🔒
  • Email addresses – also support multiple entries, each with a “safe to contact” setting 🔒
  • Referral details and general notes

🔒 The “safe to contact” setting helps ensure client privacy. If a number or email is not marked safe, it will marked that way and require extra steps to access


🔎 Adding the Assailant (Perpetrator)

Next up: documenting the asalant.

  • First, specify the relationship between the survivor and the assailant (e.g., “acquaintance”).
  • Search for the assailant to avoid duplicates. If they’re not found, you can create a new assailant record.

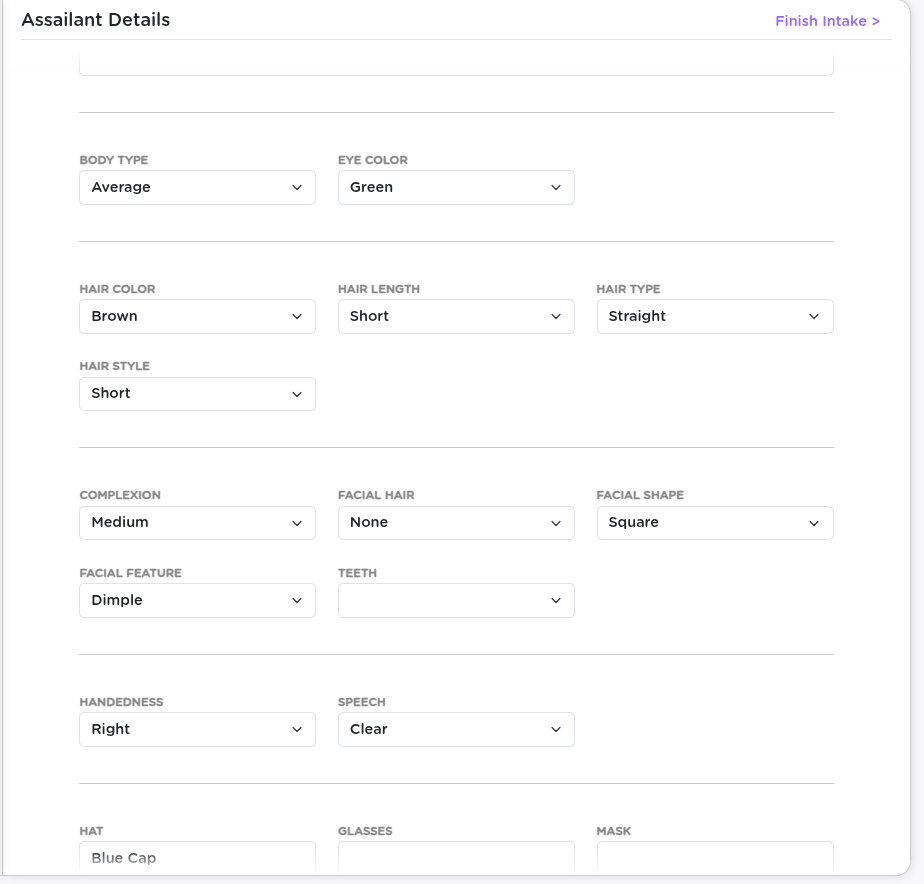
For new entries, you’ll input:

  • Name and birth date (or approximate age, which auto-generates a birth year)
  • Physical details – height, age range, tattoos, hair, clothes
  • Vehicle info – license plate, model, etc.

🧠 The more you can fill in here, the stronger your records (and reports) will be later.


✅ Completing the Intake

Once you’ve filled out everything about the survivor and the asalant, hit Next—this wraps up the intake and officially creates the record.

You’ll land on the new intake’s detail page, where you can continue working.


📎 After the Intake: What’s Next?

From the intake page, you can now:

  • Add related Investigations
  • Upload Medical Exams
  • Attach Documents
  • Add more assailants or secondary victims
  • Go back and edit anything you previously entered

🔄 Nothing is locked—you can always update, expand, or correct the info later.


🧠 Final Thoughts

The Strive DB intake process is built to handle real-world complexity while guiding you through it step-by-step. It ensures you capture everything you need while keeping client safety and data clarity front and center.

💬 Have questions about any field or how something flows? Reach out to support—we’re happy to walk through it with you.

🚀 Exploring Strive DB: A Platform Overview

Welcome to Strive DB! This platform is built for organizations like yours—teams doing important, sensitive work and needing a system that makes it easier, not harder. From client services to internal tracking, Strive DB helps you manage the details without losing sight of the big picture.

This post walks through the key areas of the system. Whether you’re a counselor, volunteer, director, or admin, you’ll get a feel for what lives where—and how to get things done fast.


📹 Your Inbox = Your Mission Control

When you log in, you’ll land on your Inbox, the nerve center for your day-to-day tasks.

  • Follow-ups
  • Forms that need your attention (either to approve or to make requested changes)
  • Area to match any unmatched calls from volunteers
  • Timesheets that need your attention

Some follow-ups are standalone reminders; others are tied to specific clients, services, or appointments. You can mark things complete or assign them to others with a couple of clicks.


🧭 Getting Around: Layout & Navigation

StriveDB uses two consistent navigation elements across every screen:

1. Left-Hand Navigation

🔍 Global Search and your main menu—jump between Clients, Services, Appointments, Forms, and more.

2. Top Bar Shortcuts

Quick actions for things like:

  • 📞 Log Contact
  • 📅 Schedule Appointment
  • 📝 Log Service

💡 Tip: Use the global search as your first stop when looking for anything. It finds clients, assailants, cases, and more.


đŸ‘€ People: Clients and Assailants, Organized

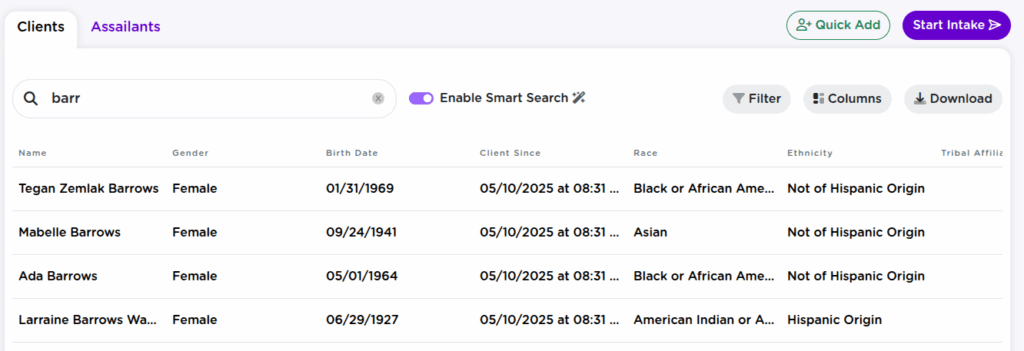
The People section houses all your clients and related parties. Use filters, search, and sorting to find what you need fast.

You can link an intake to an existing person or create a new one as needed.


đŸ› ïž Advocacies: Where the Real Work Happens

The Advocacies section breaks into focused tools:

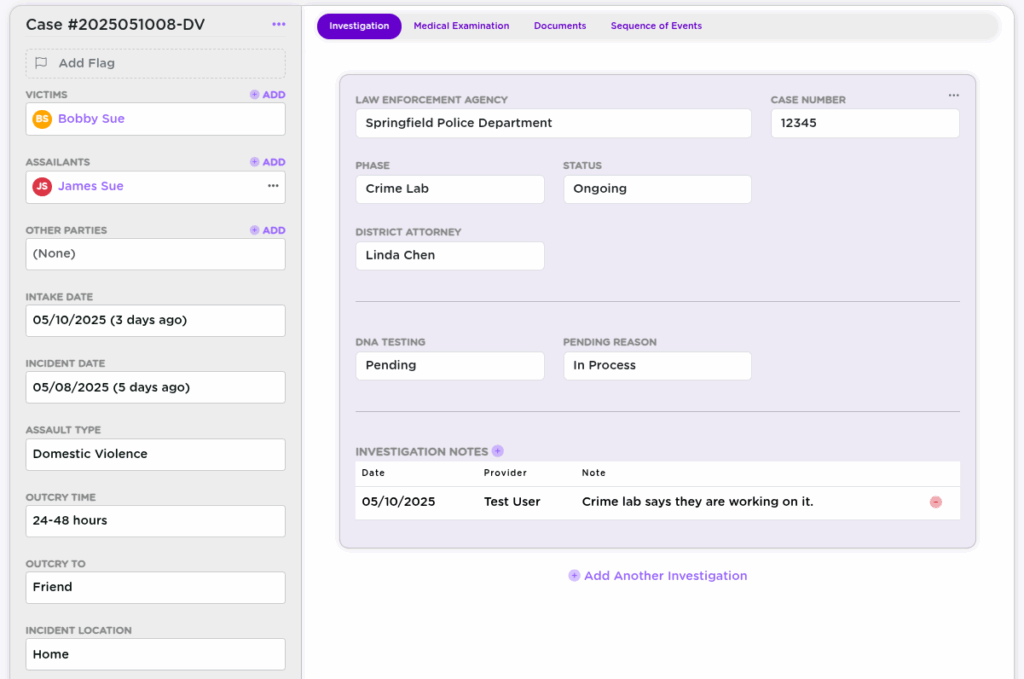
  • Cases – Main intake record with attached services, investigations, documents, etc.
  • Contacts – Log every phone call, meeting, or check-in.
  • Services – Track sessions and support for reporting + audits.
  • Presentations – Record outreach events, audiences, and details.

📄 Forms: Your Custom Questionnaires

Access any forms your org uses—closure plans, session notes, and more. Build them; customize them; and fill them out.

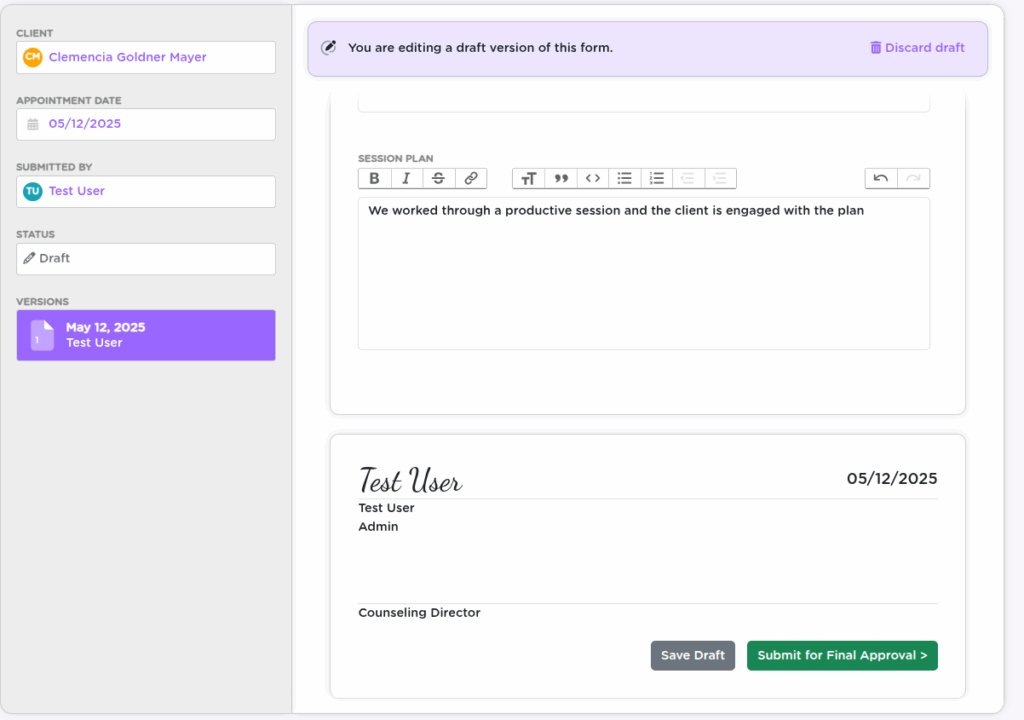
When you complete a form, it’s automatically saved to the relevant client’s record. Some forms (like session documentation) may require approval by a supervisor or director before they’re considered “complete”—you’ll see their status right in the system, and updates or feedback can be made in-line.

✅ No more chasing down PDFs or emailing forms around—everything lives in one place and flows through the right review steps automatically.


📆 Appointments: Plan It, Track It

View your calendar, search others’, and update outcomes after the fact.

  • Mark attendance
  • Reschedule
  • Add session details or follow-ups

📊 Reporting: Pull What You Need

Admins can generate summaries, pull reports for grants, and dig into trends across your data.


⚙ Settings: Customize the Experience

Admins can:

  • Manage users + roles
  • Build and configure forms
  • Configure service codes + grant tags
  • Customize field names + data collection options

🆘 Need Help?

Hit the Support button in the lower-left corner for fast help and answers.


🔁 Recap & Dig In More!

StriveDB is built to help you stay organized, track work across your team, and keep data safe and compliant.

Check out these next steps: